In today’s digital world, it’s essential to know how to turn paper documents into digital files. Whether you’re organizing important papers for work, scanning research materials for school, or just trying to clear out clutter, learning how to scan documents from your printer to your computer is a valuable skill that can make your life easier. We will explore the interplay of hardware and software involved in the scanning process, providing you with detailed instructions for a seamless experience.
Below, we will discuss the importance of converting your documents into digital files and saving them on your device. We’ll also cover key factors like resolution, color modes, and file compression to help you preserve the quality and purpose of your digital documents. Say goodbye to manual processes and learn to streamline your workflow with the below-mentioned easy-to-follow instructions.
How to Connect your Printer with a Computer?
Setting up the printer is possible with both the Windows and Mac operating systems. The setup process may be a bit tricky for some users, but don’t worry – the printer includes a detailed manual and necessary drivers to help you through it. After installing the necessary drivers for your printer, follow these steps to connect it to your computer and begin scanning documents. This will allow you to digitize your paperwork for convenient storage and sharing easily.
Note: Typically, your computer will recognize a printer once it’s connected via USB or Bluetooth. If your computer doesn’t automatically detect the printer, you can manually set it up by following the simple steps provided below.
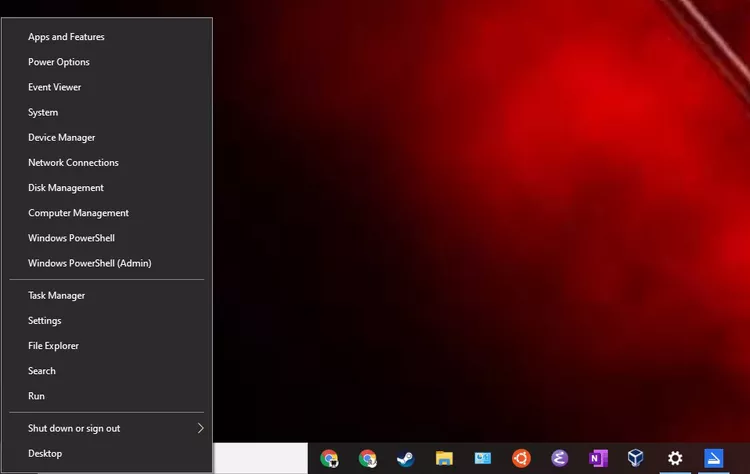
- Click on the Start tab and navigate to the Settings section.
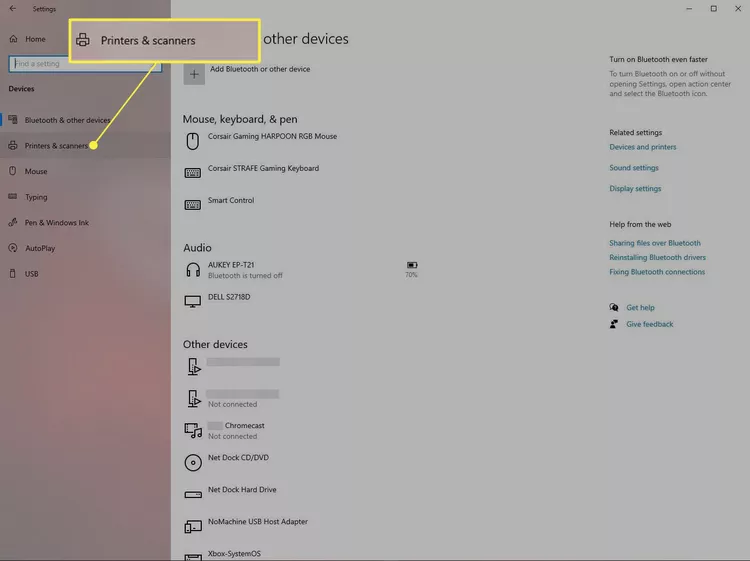
- Click on the Devices.
- Select the Printer and Scanners option.
- Then, on your display page, go to the Add Printers and Scanners section.
- In that section, click on the Add Printers and Scanners option.
- Here, the computer will begin to scan the printer for nearby devices.
- Check the list to see if you’ve found your device, and then click on the Add Device option.
- If you don’t find the device, click on the option stated under the “The printer that I want is not listed” link.
After completing the setup steps, you can now connect your printer to the computer. Once connected, you can begin scanning by following the instructions provided.
Also Read:-How to Fix Wireless Printer Problems in Windows 10?
Step-by-Step Process to Scan the Document from Printer to Computer
Digitizing your documents is the most effective way to safeguard them from damage. By simply scanning your documents from a printer to your computer, you can easily organize and manage all your important paperwork. Before proceeding with the steps below, make sure your device is a printer/scanner combination. It is important that your device has the ability to scan and save documents. If you’re unsure, refer to your printer’s original documents or search online for more information about its capabilities.
- After connecting your printer to the computer by following the above steps, press the Windows key on your Keyboard and open the Taskbar section.

- Here, type the Windows Scan and open the app.
- If your computer does not already have Windows Scan, download it from the Microsoft Store.
- Place the document you want to scan in the document feeder tray or flatbed; it will depend on the type of device you have.
- Thereon, on the Scan page of the Windows Scan, navigate to the Scanner Field.
- Search for the Scanner you want to use.
- Next, choose the device location from the Source field you would like to scan.
- Click on the file type you wish to save the document as. JPEG is a suitable default format for most document types.
- Select the Show More option and save the file.
- Browse to the location on your computer where you are required to save the scan.
- Click on the Scan option to start scanning the document.
- After scanning your document completely, select the View tab and perform the minor image editing tasks.
- Finally, the image is almost ready for saving.
Steps to Connect the Printer to Your Mac Device
If you are using a Mac, please pay close attention to the following instructions, as they may differ slightly from those for Windows users. Make sure to follow the steps carefully to ensure the successful completion of the task.
- First, navigate to System Preference.
- Click on the Printers and Scanners option.
- Verify if your Apple Computer has your printer installed; if not, select the “+” option.
- This will open the Add Printer window.
- Select the IP and set it up using the network address in the case of a wireless printer.
- For USB printers, the device is automatically listed.
You’re ready to start scanning with your printer! Continue reading to learn how to initiate the scanning process.
Scan the Documents from Printer to Mac
If you have a Mac and want to scan a document from your printer to your device, follow these steps carefully. Failing to complete the process correctly may cause software issues.
- To begin the process, place the document in your device’s document feeder or flatbed.
- Choose the Apple Menu and hit the System Preferences tab.
- Click on the Printers & Scanners option.

- Select your printer from the left corner, and then click Open Scanner.
- Here, you might be required to click on the Scan button on the right before you can click on the Open Scanner.
- Please note that if you are required to use a flatbed rather than an automatic document feeder, then make sure that User Document Feeder is not selected, if it is present.
- Set the Scanning options by choosing the type of image that is being scanned with the Kind pop-up menu.
- Additionally, with the Size pop-up menu, click on the size of the scanned item.
- Select where you want to save the digital version with the Scan To pop-up menu.
- In case your device supports duplex scanning, then select duplex to scan both sides of the documents at once.
- At last, hit the Scan option.
End Note!
Digitizing your physical documents by scanning them from your printer to your computer is now simpler than ever. Just follow the straightforward steps of setting up your printer, placing the document in the scanner tray, selecting the right settings, and starting the scan process. Enjoy the convenience of having all your documents stored digitally! Scanning documents from your printer to your computer is a quick and easy way to digitize important files, share documents electronically, and keep your workspace clutter-free. This process helps you save time, stay organized, and reduce paper waste for a more eco-friendly workflow.


